Ludum Dare 40 Entry: My First Game
Just An Idea
I am a student in university, and have dabbled in web development but video games, primarily developing video games, has always interested me. I first learned of Ludum Dare watching Phil Strahl’s postmortem documentary of his LD39 entry “Power, MT”. By the start of LD40 I had played around with a few engines such as Unity and Game Maker Studio and even completed a number of YouTube tutorials. But aside from someone walking me through a few Pong clones, I’ve never actually made a game. Watching Phil go through the process of receiving the theme, brainstorming, hacking and polishing, running out of time and stressing out over the whole ordeal really inspired me. I was excited at the idea of putting myself against a wall, throwing down the gauntlet so to speak, and giving it ago. Fortunately I was just in time for LD40. I made my way over to the site to find that the theme had just been announced the day before. “The more you have, the worse it gets”, for some reason brought coffee to mind. It was probably because I knew I was going to need a lot of it. And with limited time, I didn’t really think it was a good idea to mull around too long. So I just ran with it. I just needed a way in which too much coffee would be a bad thing, near impossible I know. Again, not wanting to waste time, jittery-ness came to mind and I went with it. To be honest, I have no idea how or why I decided upon applying these two concepts with a 2D fighter pilot simulator, but again… NO TIME. So I brewed a pot and got to work.
Art and Illusions
I estimate that about 60% of my first day, I started on Saturday, was spent on visual assets. Not easy to believe looking at the game now but there were two things that slowed me down. One, not really having a visual aesthetic in mind and two, not having any artistic abilities to speak of.
In the end I solved the first by choosing an art style that can only be described as “time saver sheque” . I knew no matter how much effort I put into polish, it wasn’t going to look good and having already spent so much time looking at sample art I figured the simpler the better. And I solved the lack of artistic abilities by finding examples of what I needed and using them as guides. I know looking at the finished product you’re probably thinking there’s an eight year old kid out there who’s art I stole. Again, I stress, ZERO ARTISTIC ABILITIES.
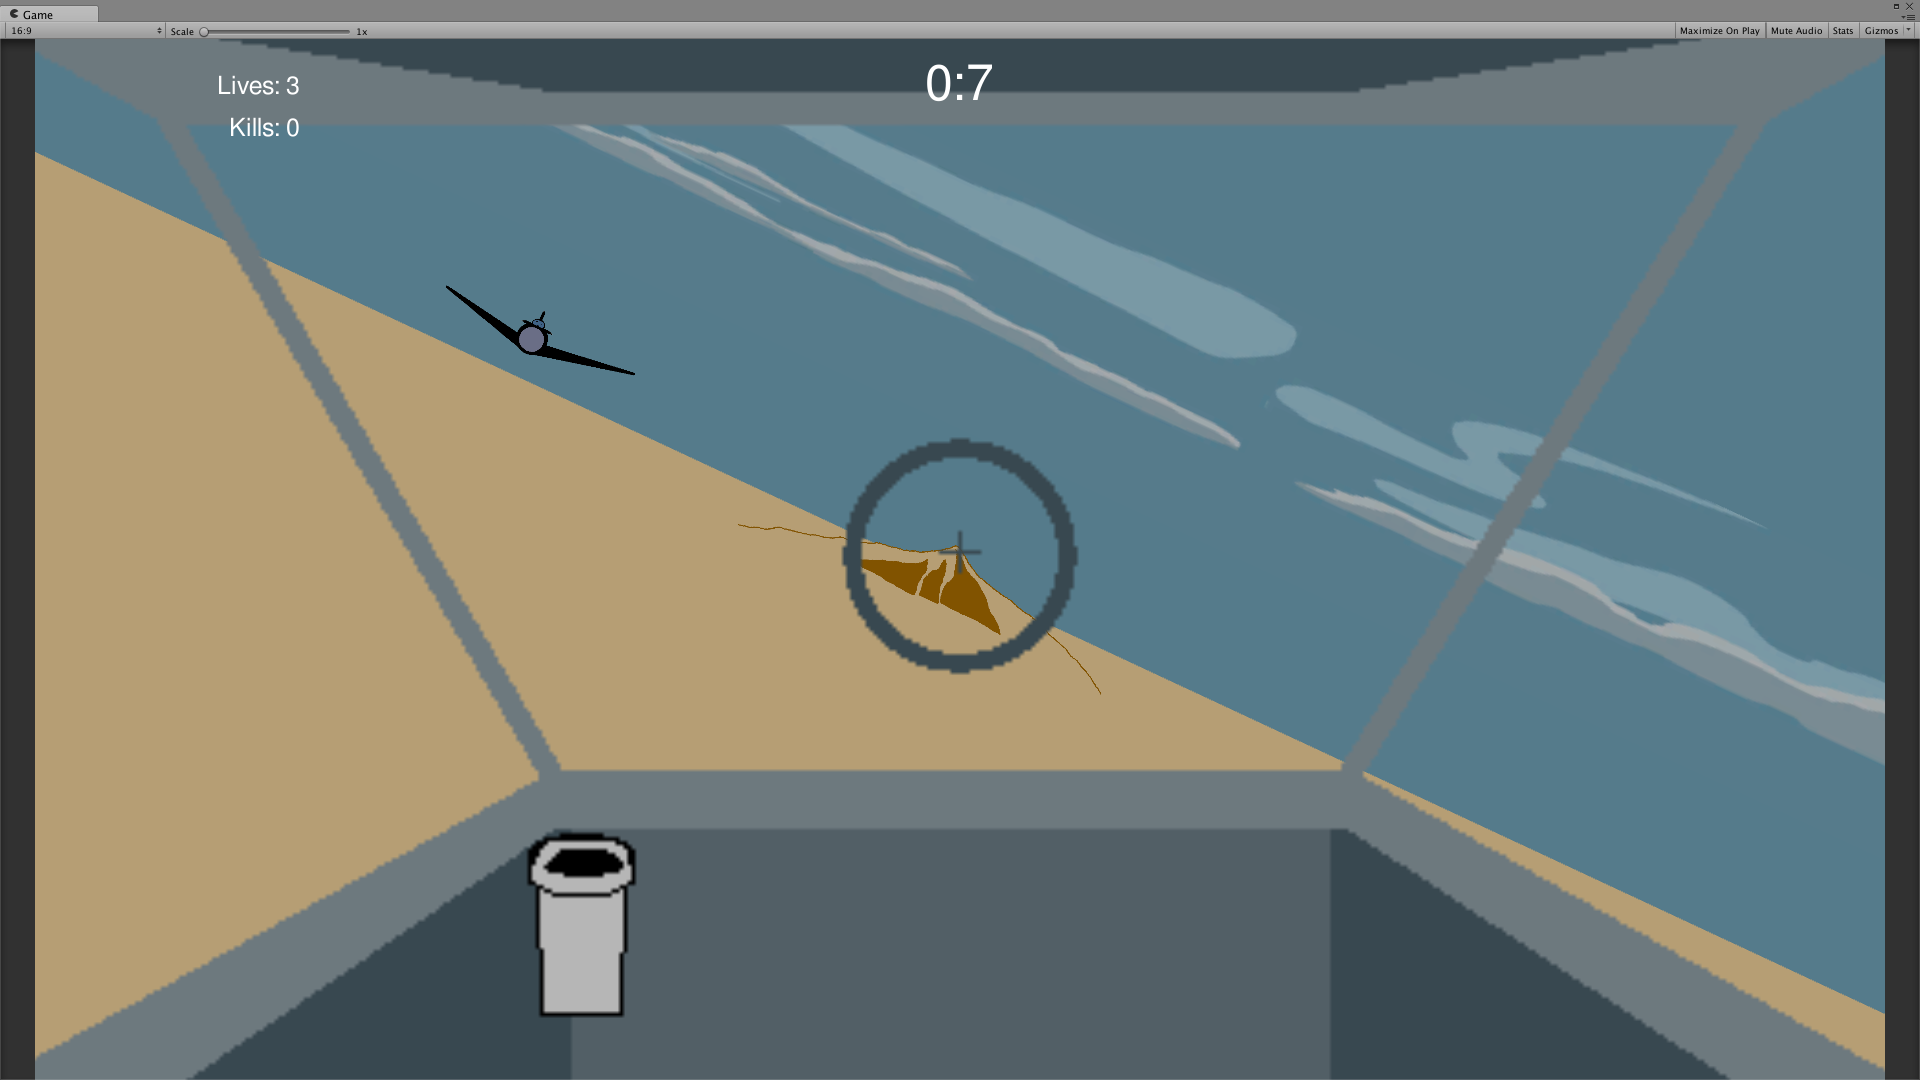
The other 40% of Saturday I spent cramming those assets into Unity and started working on creating the illusion of forward movement. Wrapping my head around the concepts of a 2D endless runner fighter pilot sim, there were two things I knew I would need to figure out how to do. One was rotating the players view as they turned and making it smooth enough not to seem jerky, especially since I would be using flat 2D sprites, and the other would be moving props and enemies forward while scaling their size, giving the appearance of forward motion.
Tilting the Camera
First things first, tilting the camera. I tried what I thought would be a straight forward approach by grabbing the main camera objects transform component and applying incremental value to it’s x rotation. I first tried applying the exact angle I wanted the camera to finally rotate to. I knew it would be a very snappy effect and not exactly what I was looking for but I figured if I could get to the point that I was manipulating the camera’s rotation, creating a sort of “lerping” effect would be no problem. No joy, however. The camera view immediately snapped up side down, rotating along the X axis 180 degrees. Clearly I did not understand Unity’s transform component. Luckily, I found a great example in the Unity API Documentation, a site I have, over the course of this jam, fallen in love with.
Here’s what I wound up using in the game:
float maxAnle = 30.0f;
float smoothing = 2.0f;
float angle = input * -maxAngle ;
Quaternion targetRotation = Quaternion.Euler(0, 0, angle);
transform.rotation = Quaternion.Slerp(transform.rotaion, targetRotation. Time.deltaTime * smoothing);
Forward Motion
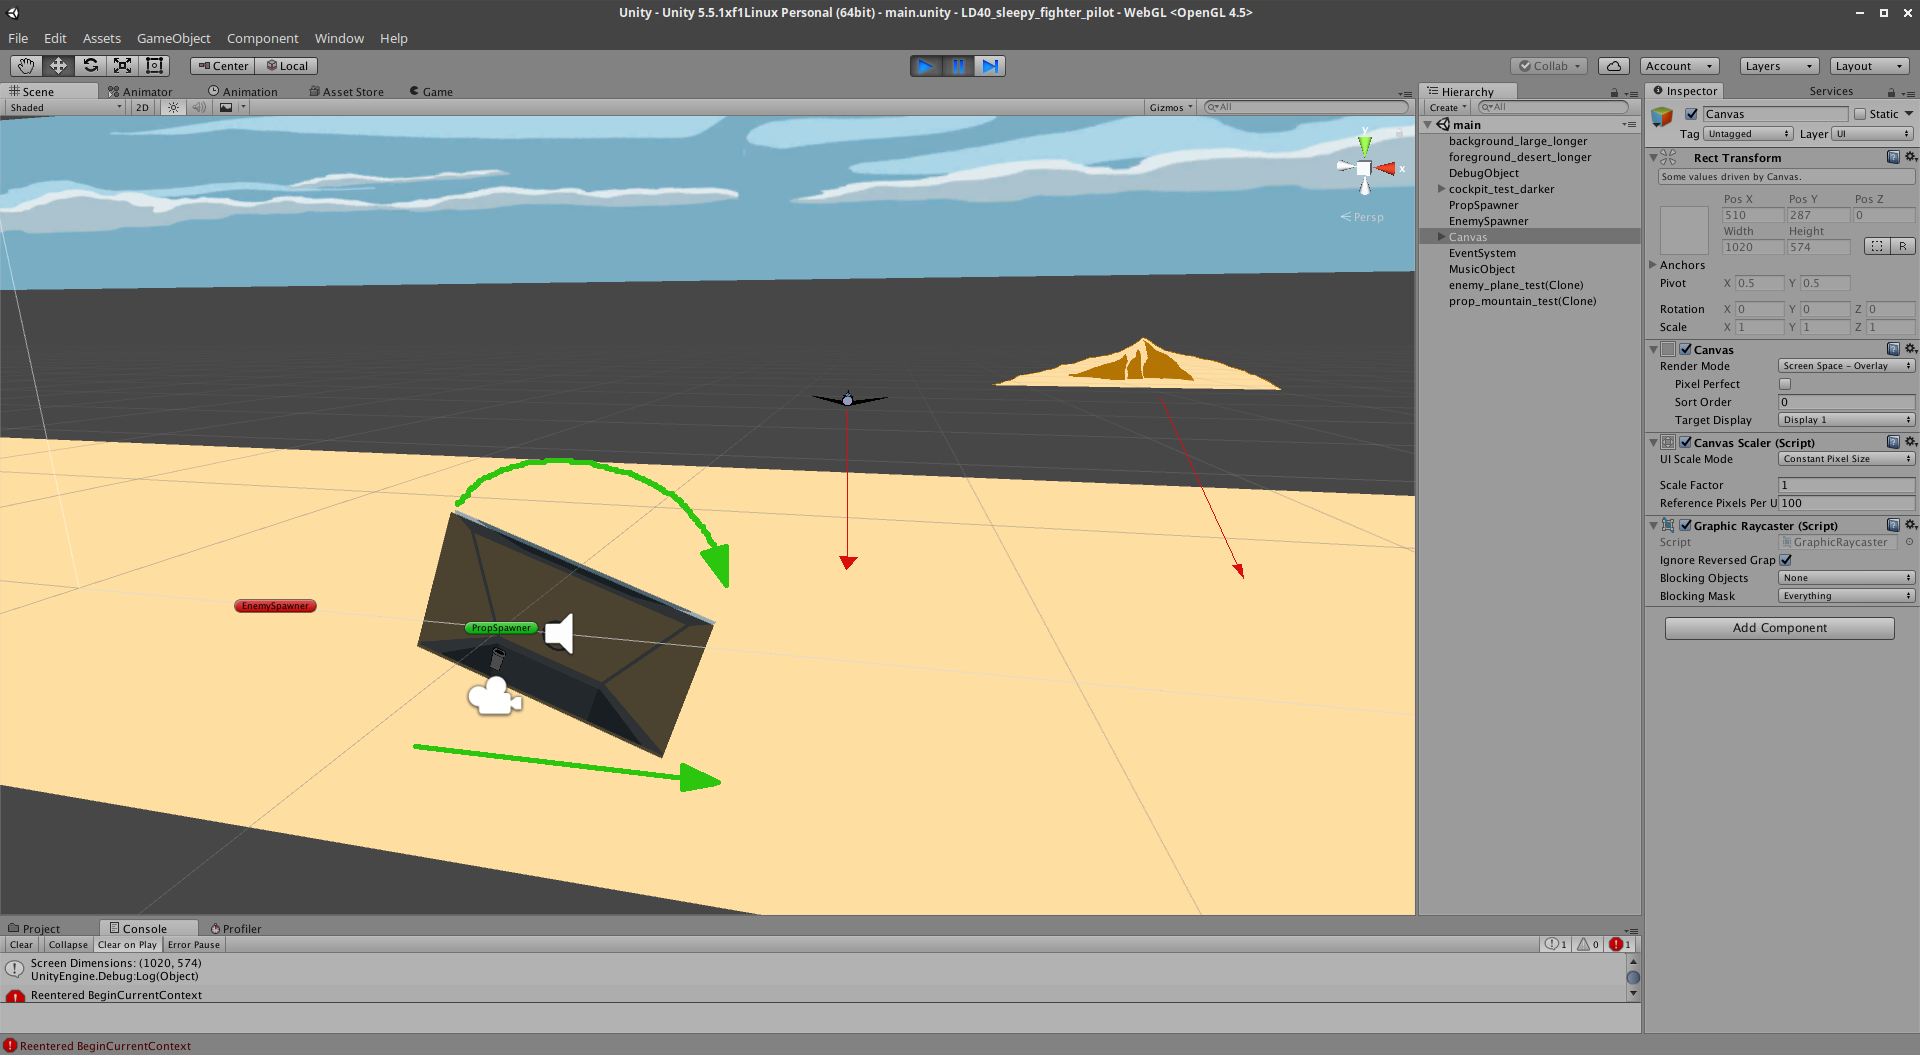
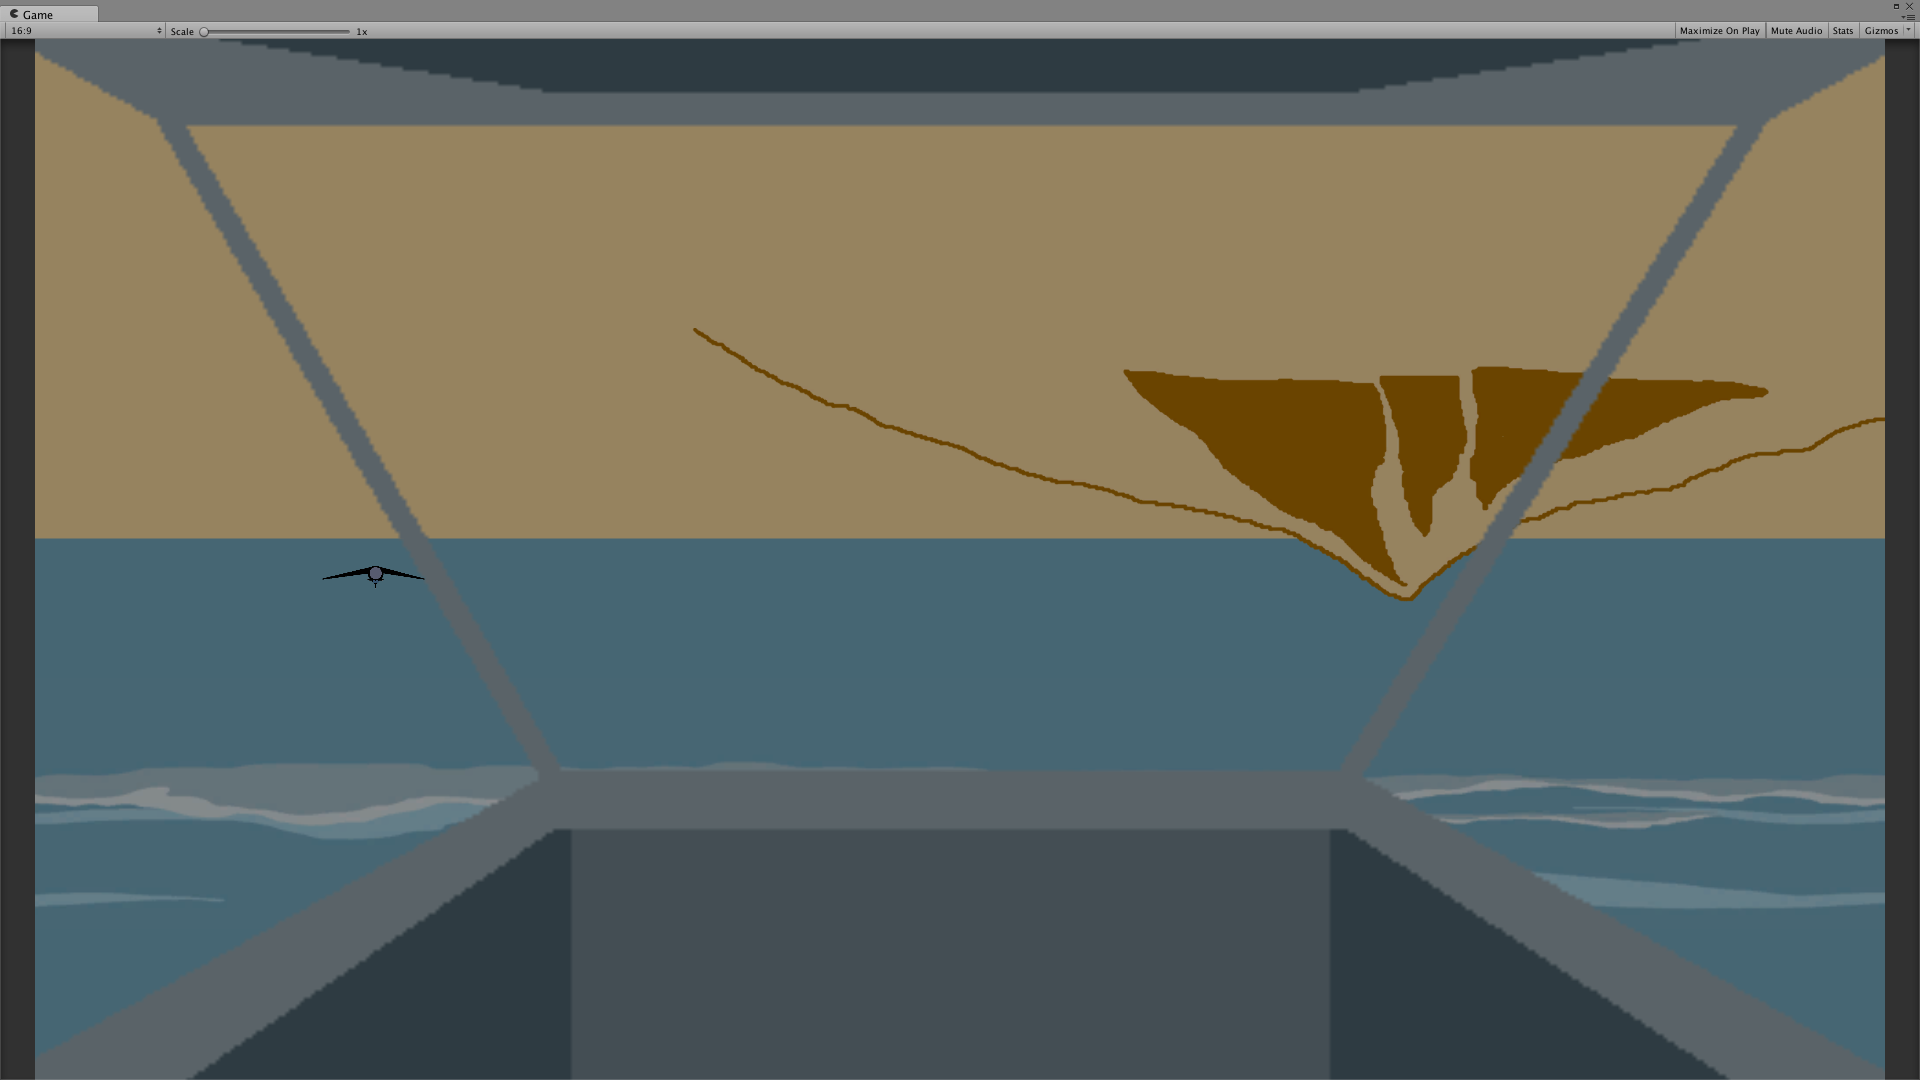
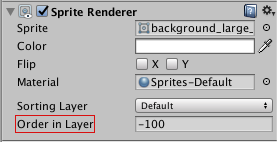
With that, I was done for the day. I picked back up on Sunday, refocusing on the movement problem. With a smooth tilt effect in place, I just needed some props to move towards the player. I put together a mountain sprite I deemed “usable” and tried to reason how I might place it in the game space and how I was going to move it in a convincing way. At first, being 2D, I thought I was going to need to scale the sprite as it got closer to the player’s view. But I quickly realized that, just as parallax scrolling is made simple by using Unity’s 3D perspective camera, sprite scaling work’s just as easily. So I simply placed my “usable” mountain sprite in front of the main camera’s view and started reducing it’s position along the Z axis. I was really surprised at how easy the effect was to complete. I really thought I would have to do more than that but no. I did have to be mindful of drawing layers however. When I first placed the mountain prop on the screen I put it’s starting position well past the sky back drop and it was still visible. Having a background, mid-ground and with the moving props serving as the foreground, figuring out a good ordering system for Unity’s rendering engine was key. Fortunately you only need to change one simple value in the editor so experimenting and finding out what works took no time at all.
Wrapping Up Sunday, Running Out Of Time
With a perfectly adequate move effect in place it was time to throw Unity colliders on everything and start working on the game play. So for the rest of Sunday I did just that. I placed the enemy planes in the game world and gave them basically the same code as the mountain props with a slight adjustment that makes them track the player. Easy-peezey. This is when I started regretting having spent so much time messing with art assets. It was late and I was resigned to calling it a day having only implemented the bare bones of the game play. I still had a lot to work out, and a lot of effects I thought would be crucial to explain the theme, none of which I was sure how to do. Worst of all, I had school in the morning and I would be stuck in class all day. I knew I wouldn’t have a chance to touch the game again. At least not by the submission dead line. I had a great time up to that point and aside from following along with YouTube tutorial’s it was the first time I had ever really engaged in what someone might call “game development”. I couldn’t believe how great it felt making those crappy art assets come to life. All I really wanted to do was stay home and work on the game. But priorities…
So Monday morning, submission day, I set out for school. All I could think about was how close I had come to actually making a game and how let down I felt. 8 hours to go. I would spend two in the car, one on the way to school and another on the way back and at least 4 hours of classes. Bummed, I stopped by the gas station near my place. I always stop and buy a sugar free Monster for the trip into school. But when I parked the car I started thinking it all over in my head. Thinking about what I really wanted. So… I bought two Monsters instead and headed back home. Crappy art assets and all, I was going to finish this game.
Priorities
Really I didn’t think there was too much to do before I could call this thing a game in the most basic since. One thing I knew I needed was an effect that simulated the pilot falling a sleep. I figure placing an object in front of the main camera and then controlling it’s alpha over time, starting invisible and having it fade to black, would work. I used a quad and applied a black mesh to it. I just didn’t know exactly how to control the alpha component of a mesh renderer in Unity.
Here’s what I wound up using in the game:
float alphaValue += fadeSpeed * Time.deltaTime;
GetComponent<MeshRenderer>().material.color = new Color(0, 0, 0, alphaValue);
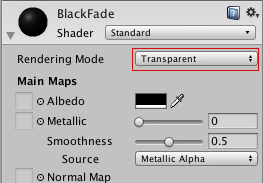
As simple as I thought, only thing was… it didn’t work. When I started the game the screen was completely black. The alpha value clearly was not being changed. After a short visit to the Internet I learned about Unity’s rendering modes. On any given material you can have it’s rendering mode set to either opaque (the default), cutout, fade and finally transparent (the one it turns out I needed).
With that set I had my fade effect officially representing our pilot dosing off. After hooking up a quick mechanic to ward of this sleepy effect, I had the basic concept. Not balanced or polished, but it was there. Now, using a periodic shot of coffee, the player would be able keep the pilot awake a little while longer. It wasn’t exactly right but the tools were there to play with.
Inching Across the Finish Line
After playing around with some other assets, trying to make a few more mountains to dodge, I realized the dead line was coming quick. I simply wasn’t going to have enough time for a lot of the things I wanted to implement and balance out. So I didn’t have a fail state and I didn’t have a win sate. I needed something quick. I gave the player the old standard 3 lives and figured counting his/her kills would suffice as a sort of score. I also thought maybe a timer would be nice? Probably would have been better to use some kind of distance counter, seeing how far you can go on a single run. But as it stands, the user interface tutorial I watched on YouTube, having never implemented a UI before, had a timer in it so that’s what I went with. And with that, I had twenty minutes until the submission hour. … And I had no sound.
I was kind of panicked about this and I really debated weather or not I should even try. Just like the UI, I had never messed around with Unity’s audio tools before so I knew I was going in blind. I decided to watch a few tutorials to see what I was in for. Thankfully, it was a very straight forward process. And actually the part that took the most time was sifting through on line audio libraries for free licensed clips that would work. I’m sure it seems this way for everyone on the jam, but I think I pressed play on my final test run the moment the jam clock rolled over to zero.
In Conclusion
I learned a lot on this jam. I suppose that’s the point. I also suppose that’s part of the challenge. Not just how much of a game you can make but how much can you learn about making the game. Again, a lot. So much that I was afraid I might loose some of those lessons. I decided to write this post so I might have an excuse to recall and document some of those lessons. The weekend of the jam was one of the best I’ve had. As relieved as I was to have finished, I was just as sad that it was over. I suppose posting this is also a way, selfishly, to drag that feeling out. So until April, this will have to do.
Leave a comment
Log in with itch.io to leave a comment.